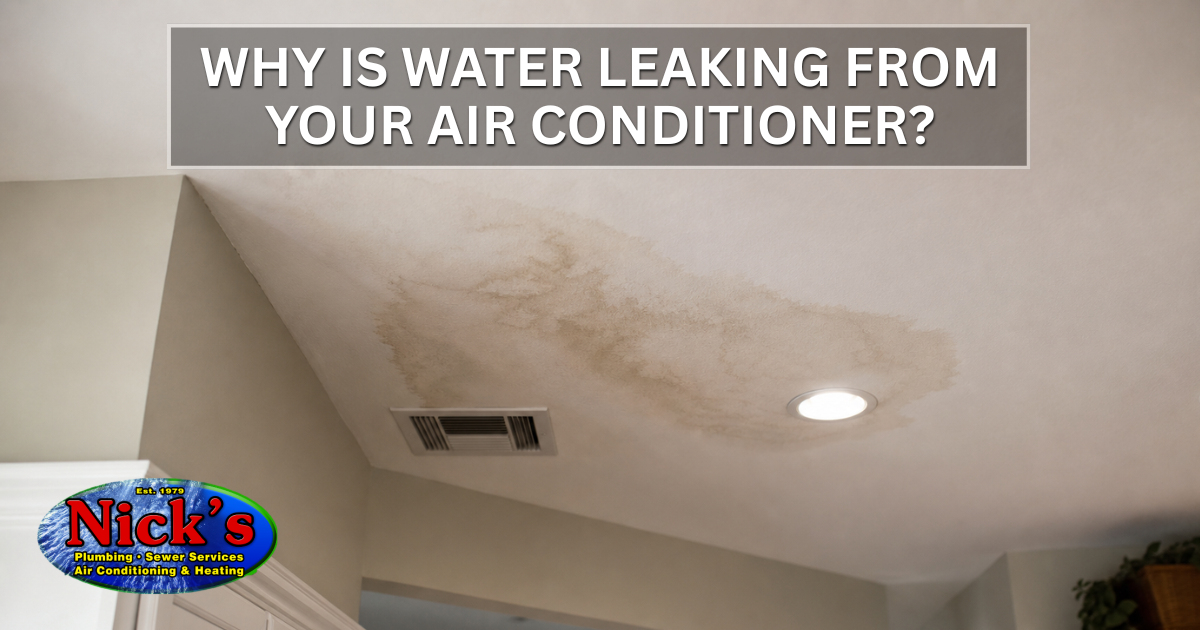
As we’re spending more and more time at home these days, now is a great time for the “do-it-yourselfers” to truly shine. One of the most common causes for a slow drain in a kitchen or bathroom sink is a dirty P-trap pipe.
What is a P-Trap?
Take a look underneath your kitchen or bathroom sink, that curved pipe that extends into the wall is called a P-trap. Personally, we think it should be called a “U-Pipe”, as it’s shaped more like the letter U. Since we don’t get to make the rules for the plumbing industry, we’re going to play along and call it a “P-Trap”.
What Does My P-Trap Do?
The purpose of this strange looking piece of plumbing hardware is to help prevent sewer line gases from entering your home. It does this by allowing a small amount of water to pool up at the low point of the trap, stopping the harmful gases from passing through the water. If you have sinks that do not get regular use, run some water into the drains at least every week or two to keep the p-trap from drying out.
I’m Caught In a P-Trap, I Can’t Get Out.
Lots of things can get caught in your P-Traps, and we’ve pulled some amazing items from customer’s drains over the years. Aside from the usual grease, food waste and soap residue in kitchen drains, your P-Trap can also help keep rings and other jewelry from being washed out to the sewer line. Items that are heavy enough to not be flushed away by the water flow through the trap can settle at the bottom of the bend, just waiting to be retrieved.
Cleaning Out Your P-Trap
P-Trap cleaning is an easy way for the homeowner to get involved in a do-it-yourself project, and to learn a little about how plumbing works. For this project, we’re going to need a pipe wrench, a bucket, and a few towels. Let’s get started.
Turn off the water supply to the sink that you’re working on from either your PEX manifold, or by turning the supply valve for the entire house off. This isn’t a necessary step, it’s more about preventing you from flooding your kitchen by running the water while the p-trap is removed and cleaned.
Place your bucket beneath the p-trap and begin to loosen the nuts at either end of the trap. For metal pipes you will need to use the pipe wrench to loosen the fittings, whereas PVC drainpipes can be loosened by hand. As the nuts are removed, any water caught in the p-trap will drain out and the u-shaped section of pipe can be taken out.
Once you have the p-trap in hand, take it to another sink, or better yet, outside, where you can give it a good high-pressure hose cleaning. Do not attempt to wash out the p-trap in the sink you just removed it from, unless you have a REALLY big bucket under the sink. Be sure to remove any accumulated hair and other debris that may be in there, and don’t forget to check for any hidden treasure that the previous homeowner may have lost.
Once the trap pipe has been cleaned out, check the pipes leading to and from the p-trap for any obvious debris. Re-install the trap by tightening the fittings back onto the ends of the pipe, being careful not to overtighten the fittings. Too much pressure from overtightening can crush the threads of the pipe ends, leaving room for water to leak out.
Leaving your safety bucket under the sink, restore the water supply to the sink and run the water into the drain. If there’s no leaks, and your drainpipe is emptying properly, congratulations, you just cleaned out your first p-trap pipe, one of the easiest plumbing maintenance tasks for the DIY-inclined homeowner.